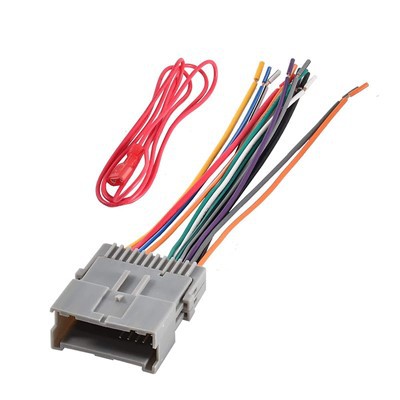
As a supplier of OBD Splitter Adapters, I understand the importance of ensuring that these devices work properly. An OBD (On-Board Diagnostic) Splitter Adapter is a valuable tool that allows multiple devices to connect to a vehicle's OBD port simultaneously. Whether you're a mechanic, a car enthusiast, or someone who uses OBD devices for various purposes, it's crucial to test your OBD Splitter Adapter to guarantee its functionality. In this blog post, I'll share some effective ways to test if your OBD Splitter Adapter is working properly.
1. Visual Inspection
Before diving into more technical tests, start with a simple visual inspection. Examine the OBD Splitter Adapter for any visible signs of damage, such as broken pins, frayed wires, or cracked housing. A damaged adapter may not function correctly or could even cause damage to your OBD devices or the vehicle's OBD port. If you notice any issues during the visual inspection, it's best to replace the adapter.
2. Compatibility Check
Ensure that the OBD Splitter Adapter is compatible with your vehicle and the OBD devices you plan to use. Different vehicles may have different OBD protocols, and not all adapters support all protocols. Check the specifications of your adapter and make sure it is designed to work with your vehicle's make, model, and year. Additionally, verify that the OBD devices you intend to connect to the splitter are compatible with the adapter.
3. Connecting to the Vehicle
The first step in testing the OBD Splitter Adapter is to connect it to your vehicle's OBD port. The OBD port is typically located under the dashboard, near the steering column. Insert the adapter into the OBD port firmly until it clicks into place. Make sure the connection is secure to avoid any loose connections that could affect the performance of the adapter.


4. Power Check
Once the adapter is connected to the vehicle, check if it is receiving power. Most OBD Splitter Adapters have an indicator light that will illuminate when the adapter is powered on. If the light does not come on, there may be an issue with the power supply or the adapter itself. Check the vehicle's fuse box to ensure that the OBD port is receiving power. If the fuse is blown, replace it and try again.
5. Connecting OBD Devices
After confirming that the adapter is receiving power, connect your OBD devices to the splitter. Depending on the type of splitter you have, you may be able to connect multiple devices simultaneously. Make sure each device is connected securely to the appropriate port on the splitter.
6. Testing Device Communication
Once the OBD devices are connected, turn on the vehicle's ignition (but do not start the engine). This will power on the OBD system and allow the devices to communicate with the vehicle. Check if each OBD device is able to establish a connection with the vehicle. Most OBD devices have a status indicator or a display that will show if a connection has been established.
If any of the devices are unable to connect, there may be an issue with the adapter or the device itself. Try disconnecting and reconnecting the devices to ensure a proper connection. If the problem persists, try using the devices directly on the vehicle's OBD port without the splitter to determine if the issue is with the adapter or the devices.
7. Reading Diagnostic Codes
One of the main functions of an OBD system is to read diagnostic trouble codes (DTCs). Use one of the connected OBD devices to read the DTCs from the vehicle. If the device is able to read the codes successfully, it indicates that the adapter is allowing proper communication between the device and the vehicle's OBD system.
If the device is unable to read the codes, there may be an issue with the adapter or the vehicle's OBD system. Check the device's user manual for troubleshooting steps or consult a professional mechanic for further assistance.
8. Testing Multiple Devices
If you have multiple OBD devices connected to the splitter, test each device individually to ensure that they are all working properly. Some devices may have different functions or features, so it's important to test them all to ensure that the adapter is able to support multiple devices simultaneously.
9. Checking for Interference
In some cases, there may be interference between the OBD devices connected to the splitter. This can cause issues with communication or inaccurate readings. To check for interference, try disconnecting all but one device and see if the problem persists. If the problem goes away, there may be interference between the devices. Try using different devices or adjusting the position of the devices to reduce interference.
10. Long-Term Testing
To ensure the long-term reliability of the OBD Splitter Adapter, it's a good idea to perform long-term testing. Use the adapter and the connected OBD devices regularly over a period of time to see if any issues arise. If you notice any problems, such as intermittent connections or inaccurate readings, it may be a sign that the adapter needs to be replaced.
Conclusion
Testing your OBD Splitter Adapter is essential to ensure its proper functionality and reliability. By following the steps outlined in this blog post, you can easily test if your adapter is working properly and identify any issues that may need to be addressed. If you have any questions or need further assistance, please feel free to contact us. We are a leading supplier of OBD Splitter Adapters and can provide you with high-quality products and excellent customer service.
If you're interested in purchasing an OBD Splitter Adapter, we offer a wide range of options, including OBD Y Splitter Cable, OBD2 Splitter Advance Auto Parts, and OBD2 3 Way Splitter. Contact us today to discuss your specific requirements and start the procurement process.
References
- Automotive Diagnostic Handbook, various editions
- OBD device user manuals