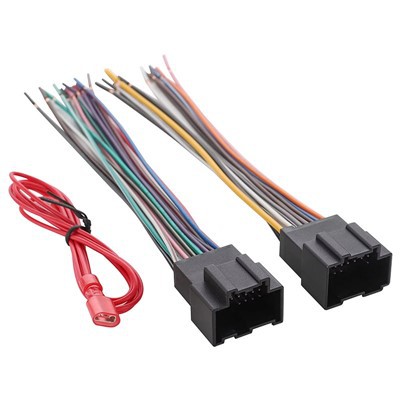
Installing a car battery harness is a task that requires a basic understanding of automotive electrical systems and a careful approach. As a supplier of high - quality Car Battery Harness, I'm here to guide you through the process step by step.
Step 1: Gather the Necessary Tools and Materials
Before you start the installation, make sure you have all the tools and materials at hand. You will need a socket wrench set, wire cutters, wire strippers, electrical tape, and of course, the Car Battery Harness itself. It's also a good idea to have a multimeter to test the electrical connections later.
Step 2: Prepare Your Vehicle
First, ensure that your vehicle is turned off and the keys are removed from the ignition. This is a crucial safety step to prevent any electrical shocks or short - circuits. Open the hood of your car and locate the battery. The battery is usually a large rectangular box with two terminals: a positive (+) terminal and a negative (-) terminal.
Step 3: Disconnect the Old Battery Harness
Start by disconnecting the negative terminal of the battery. Use the socket wrench to loosen the nut on the negative terminal and carefully remove the cable. This is done first to prevent any accidental short - circuits. Next, disconnect the positive terminal in the same way.
Once the terminals are disconnected, you can start removing the old battery harness. The harness is usually held in place by clips or brackets. Carefully remove these clips and gently pull out the old harness from its position.
Step 4: Inspect the New Car Battery Harness
Before installing the new Car Battery Harness, take a close look at it. Check for any visible damage, such as frayed wires or broken connectors. Make sure that the harness is the correct one for your vehicle model. You can refer to your vehicle's manual or consult with our customer service team if you have any doubts.
Step 5: Install the New Car Battery Harness
Begin by positioning the new harness in the same location where the old one was removed. Make sure that all the clips and brackets are properly aligned. Start by connecting the harness to the battery terminals. First, connect the positive cable to the positive terminal of the battery and tighten the nut with the socket wrench. Then, connect the negative cable to the negative terminal and tighten it as well.


Next, route the harness through the appropriate channels in the engine compartment. Make sure that the wires are not pinched or kinked, as this can cause electrical problems. Secure the harness in place using the clips or brackets.
Step 6: Test the Electrical Connections
After the installation is complete, it's time to test the electrical connections. Use the multimeter to check the voltage at the battery terminals. The voltage should be around 12.6 volts when the engine is off. If the voltage is significantly lower, there may be a problem with the installation.
Start the engine and check if all the electrical components in your vehicle are working properly. This includes the lights, radio, and other accessories. If any of these components are not working, there may be a loose connection or a problem with the harness.
Step 7: Secure and Finalize
Once you have confirmed that everything is working correctly, double - check all the connections and make sure that the harness is securely in place. Use electrical tape to cover any exposed wires or connections to prevent corrosion.
Special Considerations for Different Harness Types
If you are installing a more specialized harness, such as the 68193062AB Wire Harness or the Steering Wheel Control Harness, there may be additional steps involved.
For the 68193062AB Wire Harness, it is often used in specific vehicle models and may require a more precise installation. Make sure to follow the manufacturer's instructions carefully. This harness may have additional connectors and wires that need to be connected to specific components in the vehicle.
The Steering Wheel Control Harness is designed to connect the steering wheel controls to the vehicle's electrical system. When installing this harness, you need to be extra careful as it is located in a sensitive area. Make sure that the harness is properly routed and that all the connections are secure.
Troubleshooting Tips
If you encounter any problems during the installation process, here are some common issues and solutions:
- Loose connections: Check all the terminals and connectors to make sure they are tightened properly. A loose connection can cause electrical problems and may even lead to a short - circuit.
- Incorrect wiring: Double - check the wiring diagram to ensure that all the wires are connected to the correct terminals. If you are unsure, consult your vehicle's manual or contact our technical support team.
- Electrical component failure: If an electrical component is not working after the installation, it may be due to a problem with the harness or the component itself. Use the multimeter to test the electrical connections and check for any signs of damage.
Conclusion
Installing a car battery harness may seem like a daunting task, but with the right tools, knowledge, and a careful approach, it can be done successfully. As a supplier of high - quality Car Battery Harness, we are committed to providing you with the best products and support. If you have any questions or need further assistance during the installation process, feel free to reach out to us.
We offer a wide range of Car Battery Harness products, including the Car Battery Harness, 68193062AB Wire Harness, and Steering Wheel Control Harness. Our products are designed to meet the highest standards of quality and performance.
If you are interested in purchasing our products or have any questions about our Car Battery Harness, please contact us for a detailed discussion. We look forward to working with you and helping you find the perfect solution for your automotive needs.
References
- "Automotive Electrical Systems" by John H. Burkholder
- Vehicle owner's manuals for various car models